Statistical Machine Translation on Azure VM using Moses
Lately I’ve been working on a side project - a statistical machine translation model (from German to English) using the Moses SMT toolkit. I’ve been using laptop to perform even the heavier computations, some of which even took from 6 to 8 hours. It was all manageable until the last stage, where on a reasonable machine with 4 CPU cores it was going to take more than a week to complete. So I decided to check out what Microsoft’s Azure Cloud Service can offer and now after the model is complete, let me share my experience with you.
Creating a Machine Translation Model
In statistical machine translation (SMT), translation models are trained on large quantities of parallel data, which is a collection of aligned sentences in two different languages, in that each sentence in one language is matched with its corresponding translated sentence in the other language. We can split the implementation of a such model into 4 main stages:
Preparing the Data
The input data has to be split for training (90%), testing (5%) and tuning (5%), also cleaned from bad symbols and tokenized. By tokenizing in this case I mean the process of breaking the text string into words. For example if we have a word which is immediately followed by a punctuation mark - they have to be separated by a whitespace, otherwise they will be considered a single unit which will decrease the translation quality (“then,” -> “then ,”). We also have to prepare a language model of the target language which is going to be used at a later stage when translating.
Training
The training process in Moses takes in the parallel corpus and uses coocurrences of words and segments(phrases) to infer translation correspondences between the two languages of interest. As a result we get a phrase table. It may take some time to compute, in my case with 200MB of input data on a laptop I had to wait for 10 hours to complete. More about the inner workings of the decoding mechanism can be found here.
Testing
After the model has been trained, we can use the efficient search algorithm implemented in Moses to quickly find the highest probability translation among the exponential number of choices. This is also called decoding. Here we can translate the testing data and check the translation quality score by using a variety of methods. The one I’ve used is called BLEU and is incorporated in Moses.
Tuning
The final step in the creation of the machine translation model is the parameter tuning, where the different statistical models are weighted against each other to produce the best possible translations. The part of the corpus allocated for tuning gets translated and the model weights get readjusted. The process repeats until there is a considerable improvement in the translation score. Each iteration takes a lot of time on its own and the task is expected to make around 15 iterations on average until a good local maximum is found. This is the most computationally intensive stage as it can take days even weeks depending on the input data and the hardware.
Choosing a VM for the Tuning Process
We can choose from a variety of machines depending on the needs. There’re “General Purpose”, “Compute Optimized”, “Memory Optimized”, “GPU” and “High Performance Compute” configurations so I went for the F Series (Compute Optimized) instance F16s with 16 Core Intel Xeon CPU and 32GB of RAM and Ubuntu as OS. Of course we’re provided with the option to change the configuration at any time should we decide that the current one doesn’t fit our needs. For those of you who want to geek out Microsoft offers a free trial.
The Tuning
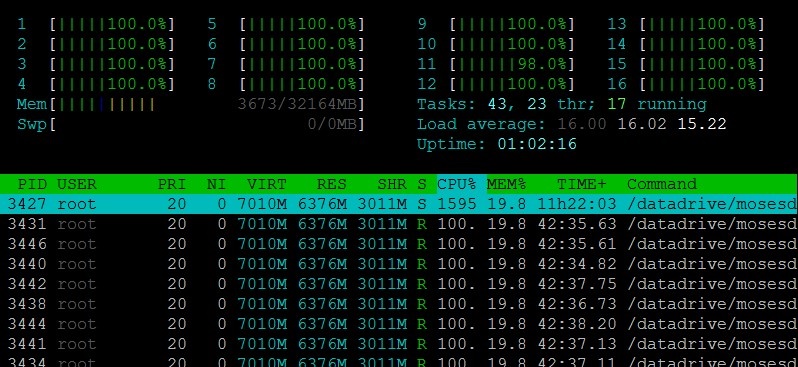
This was the most satisfying part. Fortunately, the Moses Decoder is highly parallelizable so I was able to utilize all of the 16 cores on the machine. The process was a pleasure to watch :).

Luckily, it made 9 iterations and stopped. It took around 27 hours which on my machine would probably have taken more than a week so I was very pleased with the results. I am now able to translate small to medium length German sentences into English fairly accurately, yet there’s still a long way to go until it matches the commercial systems in terms of translation quality.

You can check out the scripts for creating the model on GitHub.
comments powered by Disqus